Today, We will discuss about how to create dummy data in laravel 11. We can easily add dummy data into laravel using this factory.
In Laravel, we need test data for some functions. It takes a lot of time to add data manually. To prevent this, Laravel provides us with a factory to generate test data. The Laravel factory allows the creation of dummy or test data for testing purposes.
Now, We will create example for how to create dummy data into laravel 11. so you can follow below steps.
Laravel 11 CRUD Example Tutorial
Now, we follow the below step for creating the Laravel 11 Yajra Datatables Example.
Overview
Step 1: Install Laravel 11
Step 2: MySQL Database Configuration
Step 3: Create Migration Table
Step 4: Create Model
Step 5: Create New Factory Class
Step 6: Add Dummy Data
Step 1 : Install Laravel 11
We are going to install laravel 11, so first open the command prompt or terminal and go to xampp htdocs folder directory using the command prompt. after then run the below command.
1 | composer create-project laravel/laravel:^11.0 laravel_11_example |
Step 2: MySQL Database Configuration
After complete installation of laravel. we have to database configuration. now we will open the .env file and change the database name, username, password in the .env file. See below changes in a .env file.
1 2 3 4 5 6 7 | DB_CONNECTION=mysql DB_HOST=127.0.0.1 DB_PORT=3306 DB_DATABASE=laravel_11_example DB_USERNAME=root DB_PASSWORD= DB_COLLATION=utf8mb4_unicode_ci |
Step 3: Create Migration Table
Now, We need to create a migration. so we will below command using create the students table migration.
1 | php artisan make:migration create_students_table --create=students |
After complete migration. we need below changes in the database/migrations/create_students_table file.
1 2 3 4 5 6 7 8 9 10 11 12 13 14 15 16 17 18 19 20 21 22 23 24 25 26 27 28 29 30 31 | <?php use Illuminate\Database\Migrations\Migration; use Illuminate\Database\Schema\Blueprint; use Illuminate\Support\Facades\Schema; return new class extends Migration { /** * Run the migrations. */ public function up(): void { Schema::create('students', function (Blueprint $table) { $table->id(); $table->string('first_name'); $table->string('last_name'); $table->text('address'); $table->timestamps(); }); } /** * Reverse the migrations. */ public function down(): void { Schema::dropIfExists('students'); } }; ?> |
Run the below command. after the changes above file.
1 | php artisan migrate |
Step 4: Create Model
Here below command help to create the controller and model.
1 | php artisan make:model=Student |
Student.php
1 2 3 4 5 6 7 8 9 10 11 12 13 14 | <?php namespace App\Models; use Illuminate\Database\Eloquent\Factories\HasFactory; use Illuminate\Database\Eloquent\Model; class Student extends Model { use HasFactory; protected $fillable = [ 'first_name','last_name', 'address' ]; } ?> |
Step 5: Create New Factory Class
In this step, we will create new factory class for create dummay data of students. so you can follow below command.
1 | php artisan make:factory StudentFactory |
database\factories\StudentFactory.php
And add the below code in this file.
1 2 3 4 5 6 7 8 9 10 11 12 13 14 15 16 17 18 19 20 21 22 23 24 25 26 27 | <?php namespace Database\Factories; use App\Models\Student; use Illuminate\Database\Eloquent\Factories\Factory; /** * @extends \Illuminate\Database\Eloquent\Factories\Factory<\App\Models\Student> */ class StudentFactory extends Factory { protected $model = Student::class; /** * Define the model's default state. * * @return array<string, mixed> */ public function definition(): array { return [ 'first_name' => $this->faker->name(), 'last_name' => $this->faker->name(), 'address' => $this->faker->address() ]; } } ?> |
Step 6: Add Dummy Data
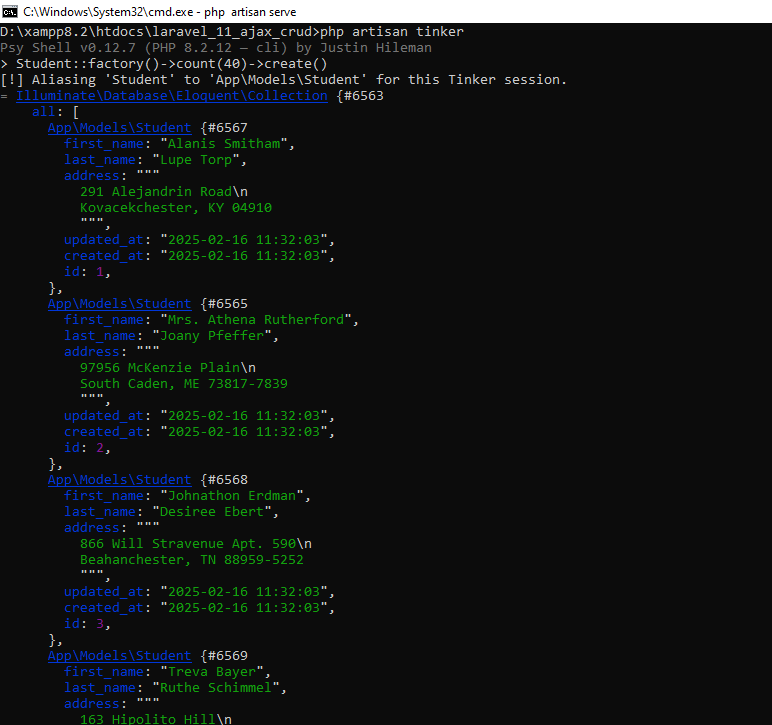
In this step, we will add dummy data into database using the below commmand.
1 2 | php artisan tinker Student::factory()->count(40)->create() |

