Today, In this tutorial, we will explain to you how to Install Apache MySQL and PHP on Ubuntu 16.04 and 18.04. PHP stands for Hypertext Preprocessor and it’s a run based on the server-side, so we have to need the apache server and MySQL database. Let’s start how to install an Apache, MySQL, and php7, php7.2 on Ubuntu 16.04 and 18.04.
If you want to install a particular version wise then you can do. such as php7.0 or php7.2
Overview
Step 1: Install the apache2 server
Step 2: Install and configure MySql server
Step 3: Install PHP
Install Apache, install MySQL, install PHP, install PHP with apache, Install PHP 7 on Ubuntu, install PHP 7.3, 7.2, 7.1 & 7.0 on Ubuntu, Install Apache with PHP 7.0, Install Apache with PHP 7.2
Step 1: Install the apache2 server
In this step, we will install the apache2 server using the below command.
sudo apt install apache2

if you want to check Apache2 is installed or no then you can open the browser and type the 127.0.0.1 or localhost to test the installation. if If you see the following screenshot of your browser, it has been successfully installed.

If you want to check status or start or restart the apache server then you can do.
sudo service apache2 status
sudo service apache2 start
sudo service apache2 restart
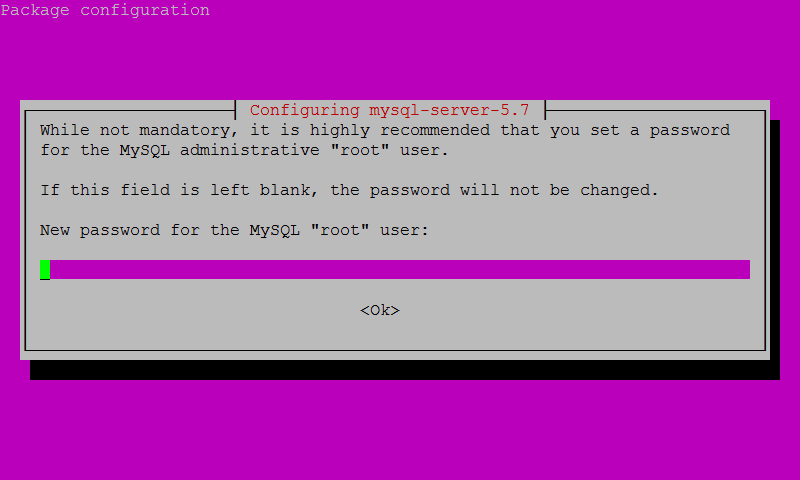
Step 2: Install and configure MySql server
Now, we install the MySQL database server using the below command.
sudo apt install mysql-server
When you install MySQL you will be asked to set MySQL password as shown below screenshot.
If you want to know the server status or you want to start or stop server then you can do using the below command.
sudo service mysql status
sudo service mysql stop
sudo service mysql start
Configure MySQL
It is suggested that you run Sudo mysql_secure_installation. This program enables you to improve the security of your MySQL installation by making some security suggestions real.
sudo mysql_secure_installation
You will be asked to enter the MySQL root password and some configuration settings.
Securing the MySQL server deployment.

Connecting to MySQL using a blank password.

VALIDATE PASSWORD PLUGIN can be used to test passwords
and improve security. It checks the strength of password
and allows the users to set only those passwords which are
secure enough. Would you like to setup VALIDATE PASSWORD plugin?

Press y|Y for Yes, any other key for No:
The Press Y then install password plugin and choose password policy.
There are three levels of password validation policy:

LOW  Length >= 8
MEDIUM Length >= 8, numeric, mixed case, and special characters
STRONG Length >= 8, numeric, mixed case, special characters and dictionary file
Please enter 0 = LOW, 1 = MEDIUM and 2 = STRONG: 2
Press 2 and “enter” key. Now, You’ll be asked to set a new password
Please set the password for root here.

New password:

Re-enter new password:
Enter the secret password and hit Enter. When finished with setting the secret password you will be then asked to remove the unknown user and test database and disable remote login as demonstrated as follows.
Press Y for the remove anonymous users and hit enter.
Normally, root should only be allowed to connect from
'localhost'. This ensures that someone cannot guess at
the root password from the network.

Disallow root login remotely? (Press y|Y for Yes, any other key for No) :
Press Y for the disallow remote login
By default, MySQL comes with a database named 'test' that
anyone can access. This is also intended only for testing,
and should be removed before moving into a production
environment.

Remove test database and access to it? (Press y|Y for Yes, any other key for No) :
Press Y for the remove the test database
Reloading the privilege tables will ensure that all changes
made so far will take effect immediately.

Reload privilege tables now? (Press y|Y for Yes, any other key for No) :
Press y from the flush privileges.
Now, you can test your MySql login with your username and password. you can use the root password.
mysql -u root -p
Enter password:
Step 3: Install PHP
In this step, we will install the PHP using the below command.
sudo apt install php libapache2-mod-php
If you want to know that, which version installed of PHP in the current system? then you can use the below command.
php -v
Search
Tools
Category
Latest Post
Popular Post
- Angular 10 – Can’t bind to ‘formGroup’ since it isn’t a known property of ‘form’
- Php Login And Registration Example
- Codeigniter 3 Deprecated dynamic properties in PHP 8.2
- PHP Registration with Email Verification using OTP
- Laravel 11 Ajax CRUD Example
- How to add multiple markers in google maps using Codeigniter
- Angular 15 CRUD Application Example Tutorial
- Laravel 12 Ajax CRUD Example